第11章Webアプリケーション開発
11.5 Sample Native WAD with React Native and Node or Django11.5 React NativeとNodeまたはDjangoによるネイティブアプリケーション開発の例
Learning Objectives学習目標
By the end of this section, you will be able to:
この節を終えると、次のことができるようになる。
• Create a Todo native mobile application with React Native or Node
• React NativeまたはNodeで、Todoのネイティブモバイルアプリケーションを作成する。
• Create a React Native app and its components
• React Nativeアプリと、そのコンポーネントを作成する。
• Connect the front-end Native app with the back-end Node app
• フロントエンドのネイティブアプリを、バックエンドのNodeアプリへ接続する。
In the previous sections, you worked with Bootstrap, Django, React, and Node to build versions of a Todo web application. In this section, you will learn how to use React Native and Node to develop a Todo application for mobile devices. You are already familiar with Node. Like React, React Native is an open-source JavaScript framework used to build native applications for mobile devices.
これまでの節では、Bootstrap、Django、React、Nodeを使い、いくつかの版のTodo Webアプリケーションを作成した。この節では、React NativeとNodeを使い、モバイル端末用のTodoアプリケーションを開発する方法を学ぶ。Nodeについては、すでに学んでいる。React Nativeは、Reactと同じくオープンソースのJavaScriptフレームワークであり、モバイル端末用のネイティブアプリケーションを構築するために使う。
LINK TO LEARNING学びを広げるリンク
React Native (https://openstax.org/r/76ReactNative) uses the React JavaScript library to enable native development and build user interfaces for mobile devices. React Native has the flexibility to work with Xcode, which is the IDE for various platforms. Released by Facebook (now Meta) in 2015, React Native has become increasingly popular among developers.
英語のヒント
React Native(https://openstax.org/r/76ReactNative)は、ReactのJavaScriptライブラリを使い、モバイル端末向けのネイティブ開発と、利用者インターフェースの構築を可能にする。さまざまなプラットフォーム向けのIDEであるXcodeとも連携できる柔軟性を持つ。2015年にFacebook(現在のMeta)が公開して以来、開発者の間で人気が高まっている。
Creating a Todo Web Application with React Native and NodeReact NativeとNodeによるTodo Webアプリケーションの作成
This application uses React Native and Node to implement a simple Todo mobile application. This application builds on top of the React and Node application discussed in 11.3 Sample Responsive WAD with Bootstrap/ React and Node. For this version of the application, React Native serves as the front end handling the user interface and getting and setting data via HTTP requests. Node serves as the back end that makes use of the API built using the Django REST Framework in 11.2 Sample Responsive WAD with Bootstrap and Django.
ここでは、React NativeとNodeを使い、単純なTodoモバイルアプリケーションを実装する。11.3「Bootstrap/ReactとNodeによるレスポンシブWebアプリケーション開発の例」で扱った、ReactとNodeのアプリケーションを基にする。この版では、React Nativeがフロントエンドとして、利用者インターフェースを扱い、HTTPリクエストでデータを取得・設定する。Nodeはバックエンドとして、11.2「BootstrapとDjangoによるレスポンシブWebアプリケーション開発の例」でDjango REST Frameworkを使って構築したAPIを利用する。
Prerequisites前提条件
To build the Todo mobile application using React Native and Node, you need React Native v0.67, Node v14.17.5, ExpressJS v4.17.2, MongooseJS v6.1.9, and Axios v0.21.0. This Todo application will run using the Android emulator and will use Android Studio v2021.1.1.
React NativeとNodeでTodoモバイルアプリケーションを作るには、React Native v0.67、Node v14.17.5、ExpressJS v4.17.2、MongooseJS v6.1.9、Axios v0.21.0が必要である。このTodoアプリケーションは、Androidエミュレーターで実行し、Android Studio v2021.1.1を使う。
LINK TO LEARNING学びを広げるリンク
Xcode (https://openstax.org/r/76Xcode) is the IDE for the Apple platform. For Apple, React Native provides developers with the tools needed for cross-platform development that creates user-friendly apps on mobile devices.
英語のヒント
Xcode(https://openstax.org/r/76Xcode)は、Appleプラットフォーム用のIDEである。Apple向けに、React Nativeは、モバイル端末で使いやすいアプリを作る、クロスプラットフォーム開発に必要なツールを開発者へ提供する。
• To begin, download and install an emulator for your intended platform (iOS or Android).
• まず、対象のプラットフォーム(iOSまたはAndroid)用のエミュレーターをダウンロードし、インストールする。
• If you plan to run the native app on an iOS device or emulator, download and install Xcode, which is Apple’s IDE that enables application development for Apple’s platforms.
• iOSの端末やエミュレーターでネイティブアプリを動かす場合は、Xcodeをダウンロードし、インストールする。Xcodeは、Appleのプラットフォーム向けのアプリケーションを開発できる、AppleのIDEである。
• If you plan to run the native app on an Android device or emulator, download and install Android Studio, which enables application development for Android mobile operating systems.
• Androidの端末やエミュレーターでネイティブアプリを動かす場合は、Android Studioをダウンロードし、インストールする。AndroidのモバイルOS向けのアプリケーションを開発できる。
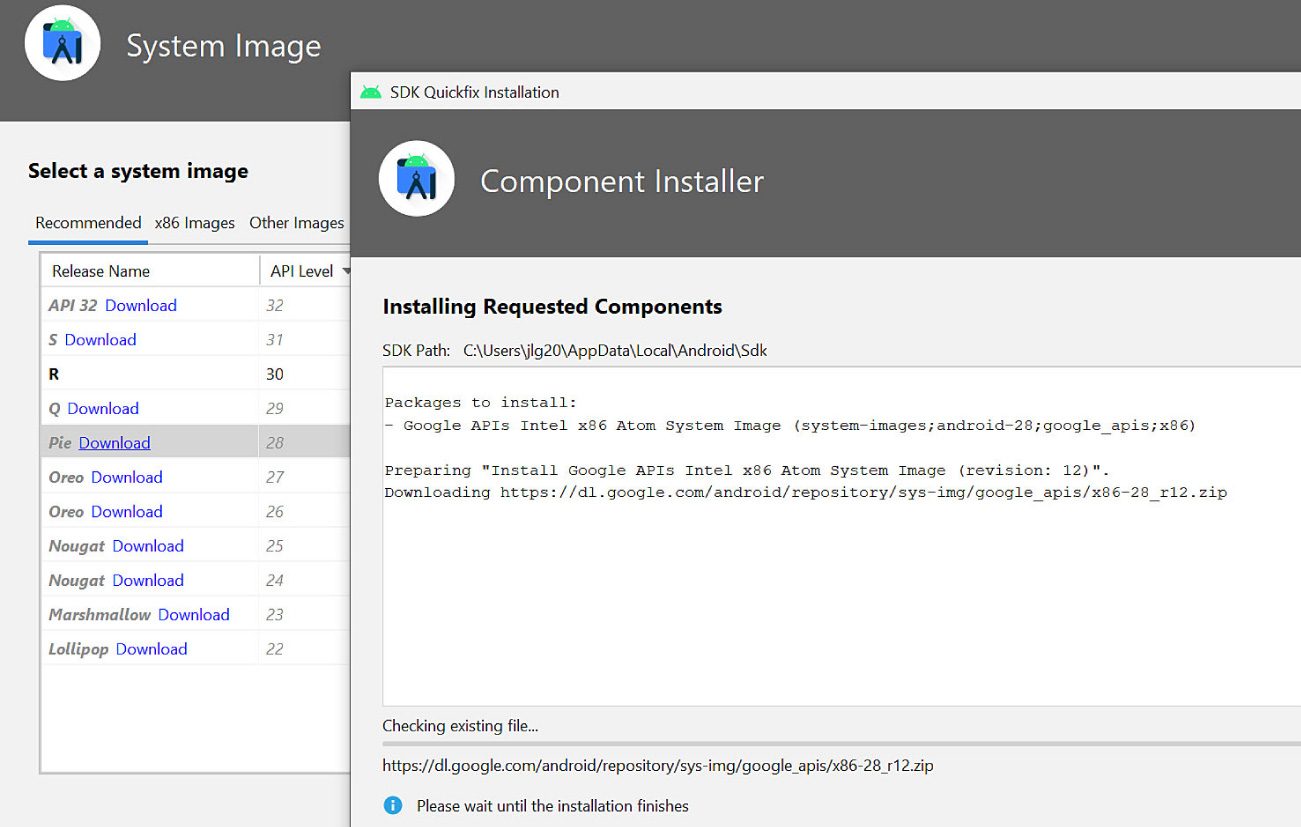
• Figure 11.38 shows how to set up the Android emulator. Launch Android Studio. From the top navigation, select Tools > Device Manager. Click on Create device. In the Select Hardware pop-up, select Pixel 5 and click Next. On the next page, select Pie Download. Click on the Download link to obtain an image as shown. Click Next followed by Finish.
英語のヒント
• 図11.38は、Androidエミュレーターの設定方法を示している。Android Studioを起動する。上部のメニューからTools > Device Managerを選ぶ。Create deviceをクリックする。Select HardwareのポップアップでPixel 5を選び、Nextをクリックする。次のページでPie Downloadを選ぶ。図のように、Downloadリンクをクリックしてイメージを取得する。Nextをクリックし、続けてFinishをクリックする。
Android Studio is a trademark of Google LLC. · 原著の利用条件・ソフトウェアの権利表示参照 · Source出典
Figure 11.38 This shows how to set up the Android emulator. (Android Studio is a trademark of Google LLC.)
図11.38 Androidエミュレーターの設定方法。(Android StudioはGoogle LLCの商標。)
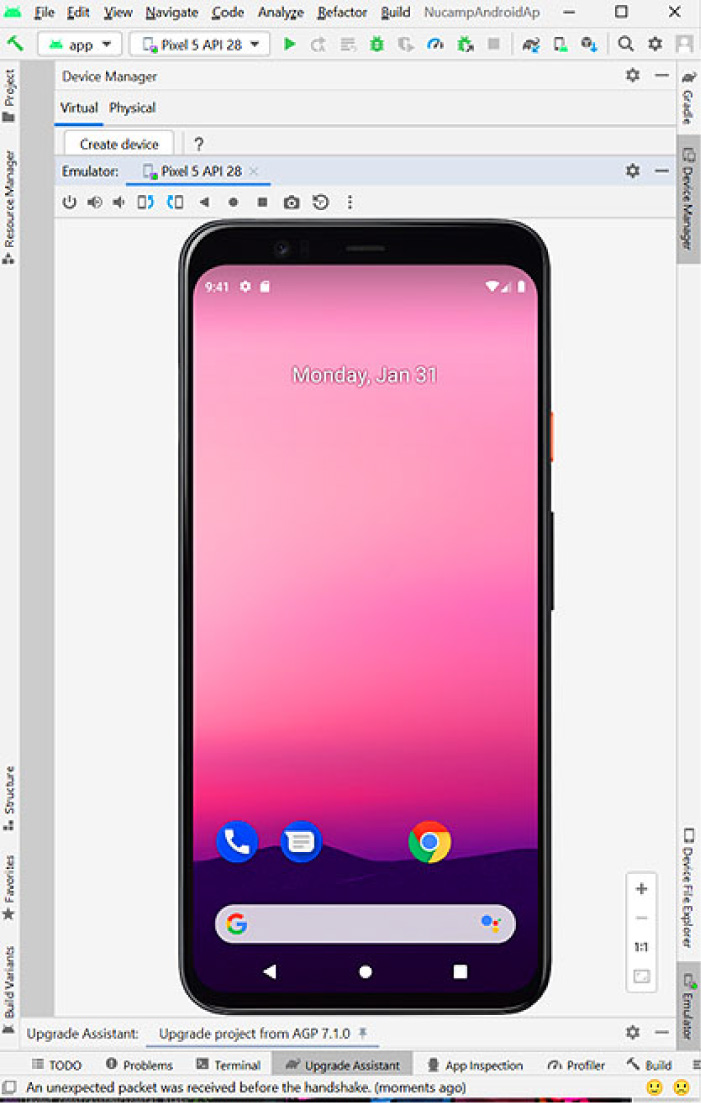
Once the image has been created, it will appear in the Device Manager. Next, click on the Start button to launch the emulator. When the emulator is launched, it will turn on, as shown in Figure 11.39.
イメージが作成されると、Device Managerに表示される。次にStartボタンをクリックして、エミュレーターを起動する。起動すると、図11.39のように電源が入る。
Android Studio is a trademark of Google LLC. · 原著の利用条件・ソフトウェアの権利表示参照 · Source出典
Figure 11.39 This is how the emulator will appear after it is launched. (Android Studio is a trademark of Google LLC.)
図11.39 起動後のエミュレーターの表示。(Android StudioはGoogle LLCの商標。)
LINK TO LEARNING学びを広げるリンク
Xcode also integrates well with Android Studio (https://openstax.org/r/76AndroidStud) for developing Android apps. Android Studio is the IDE for Android devices.
Xcodeは、Androidアプリの開発用のAndroid Studio(https://openstax.org/r/76AndroidStud)ともよく統合される。Android Studioは、Android端末用のIDEである。
Creating the React Native AppReact Nativeアプリの作成
After launching the emulator, create the React Native app by running the following command in a directory outside and separate from the nodebackend/ directory. Figure 11.40 shows the React Native application files in the reactnativefrontend/ directory.
エミュレーターを起動したら、nodebackend/ディレクトリの外の別のディレクトリで、次のコマンドを実行し、React Nativeアプリを作成する。図11.40は、reactnativefrontend/ディレクトリ内のReact Nativeアプリケーションのファイルを示している。
$ npx react-native init reactnativefrontend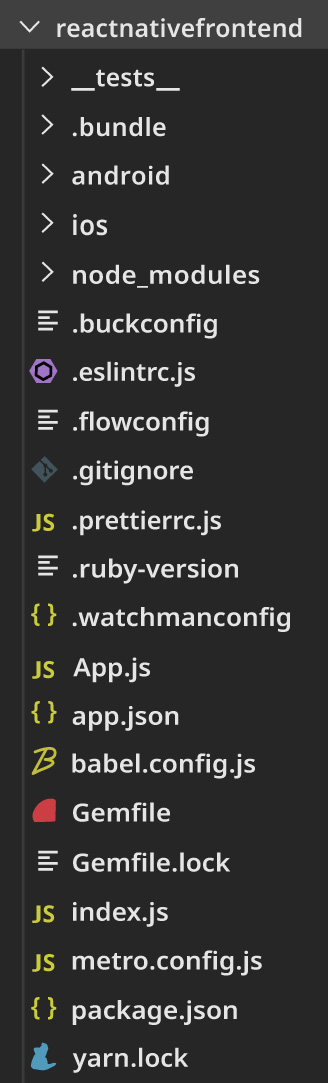
rendered in React Native, under MIT license; attribution: Copyright Rice University, OpenStax, under CC BY 4.0 license · MIT as stated in caption / CC BY 4.0 · Source出典
Figure 11.40 When the React Native app is created, it will generate the React Native application files in the reactnativefrontend/ directory. (rendered in React Native, under MIT license; attribution: Copyright Rice University, OpenStax, under CC BY 4.0 license)
図11.40 React Nativeアプリを作成すると、reactnativefrontend/ディレクトリ内にReact Nativeアプリケーションのファイルが生成される。(MITライセンスのReact Nativeで表示。出典:Copyright Rice University, OpenStax、CC BY 4.0ライセンス)
Next, navigate into the reactnativefrontend/ directory and launch the React Native application to confirm that the React Native front-end application has been created successfully. At this point, the application is not connected to the Node back end and will launch the Metro bundler, which bundles the JavaScript code that is deployed on the mobile device or emulator when the React Native front-end application is successfully completed. When this is done, run the command. Figure 11.41 shows the page in the terminal.
英語のヒント
次に、reactnativefrontend/ディレクトリへ移動し、React Nativeアプリケーションを起動して、フロントエンドが正常に作成されたことを確認する。この時点では、アプリケーションはNodeのバックエンドへ接続されておらず、Metroバンドラーが起動する。Metroは、React Nativeのフロントエンドが正常に完成したときに、モバイル端末やエミュレーターへ配置するJavaScriptコードをまとめる。ここまでできたら、コマンドを実行する。図11.41は、ターミナルでの表示を示している。
$ npx react-native start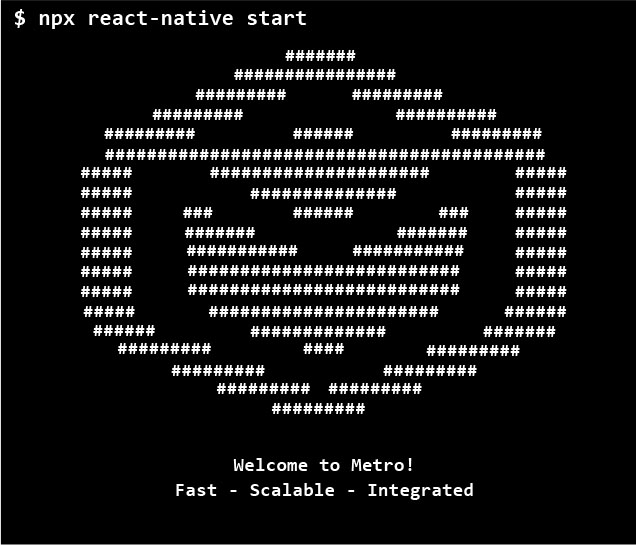
credit: React Native, under MIT license · MIT as stated in caption · Source出典
Figure 11.41 This page will appear when the react-native start command is run. (credit: React Native, under MIT license)
図11.41 react-native startコマンドを実行すると、この表示が現れる。(クレジット:React Native、MITライセンス)
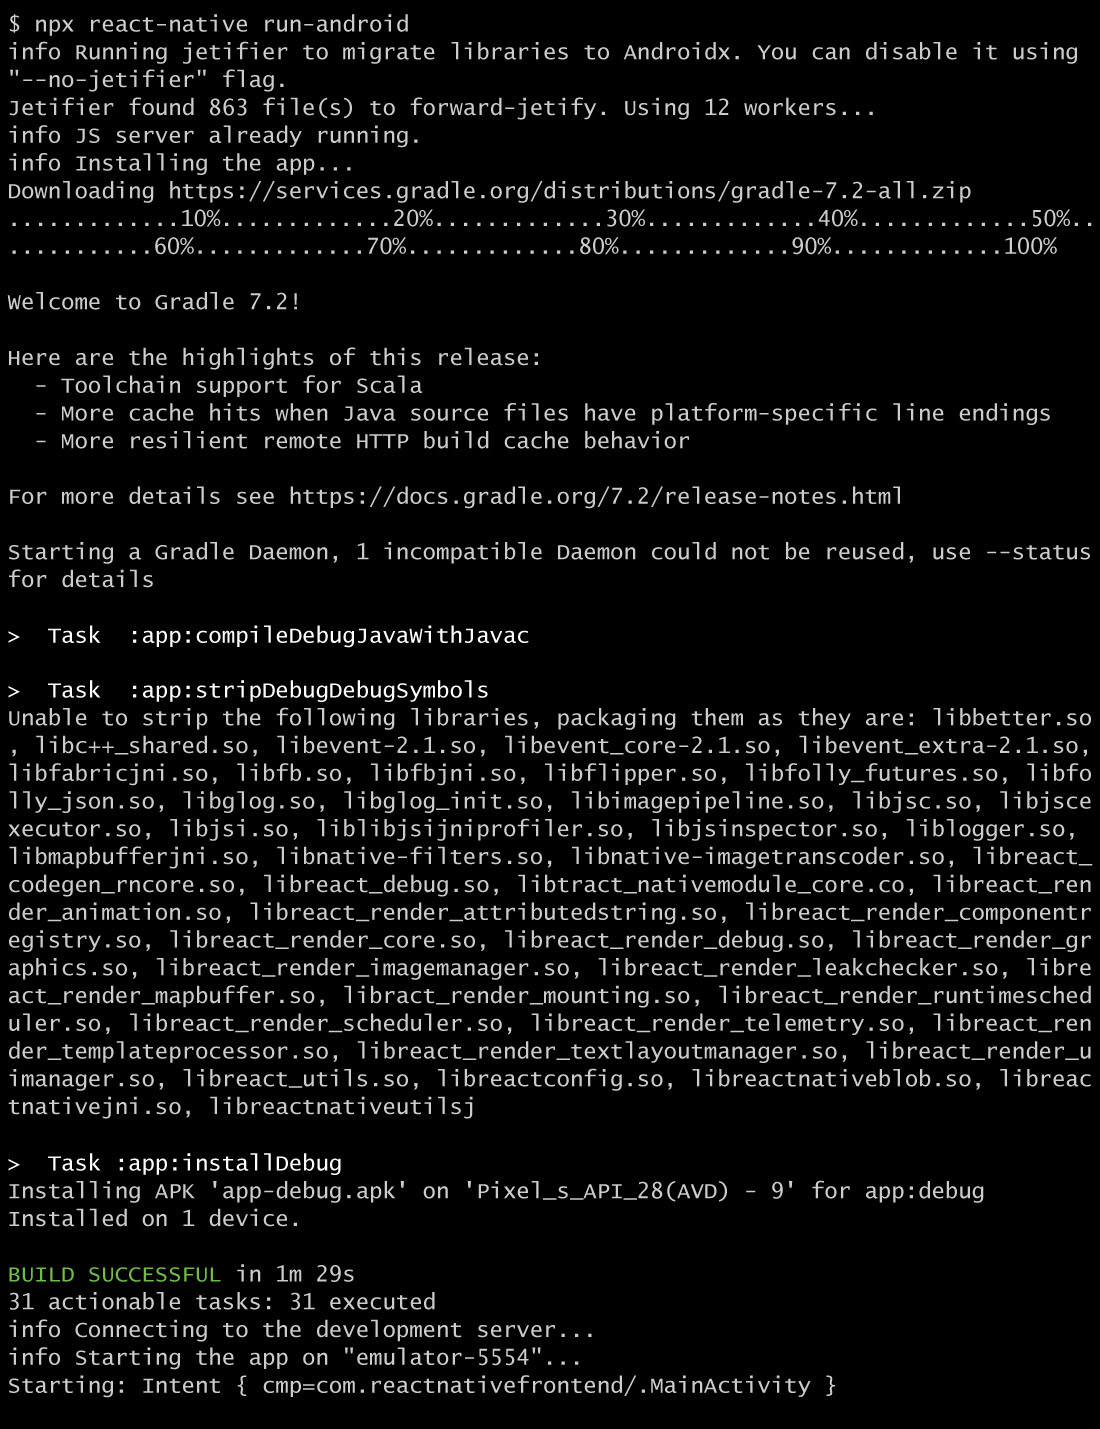
The next step is to open another terminal, navigate to the reactnativefrontend/ directory, and run the following command. This will build the front-end code and deploy it on the emulator, which may take a few minutes.
次に、別のターミナルを開き、reactnativefrontend/ディレクトリへ移動して、次のコマンドを実行する。フロントエンドのコードがビルドされ、エミュレーターへ配置される。数分かかる場合がある。
$ npx react-native run-androidWhen the application is successfully built, Figure 11.42 shows what should appear in the second terminal.
アプリケーションのビルドが正常に完了すると、2つ目のターミナルには、図11.42のように表示されるはずである。
attribution: Copyright Rice University, OpenStax, under CC BY 4.0 license · CC BY 4.0 · Source出典
Figure 11.42 This code should appear in the second terminal when the React Native application is successfully built. (attribution: Copyright Rice University, OpenStax, under CC BY 4.0 license)
図11.42 React Nativeアプリケーションのビルドが正常に完了すると、2つ目のターミナルにこのコードが表示されるはずである。(出典:Copyright Rice University, OpenStax、CC BY 4.0ライセンス)
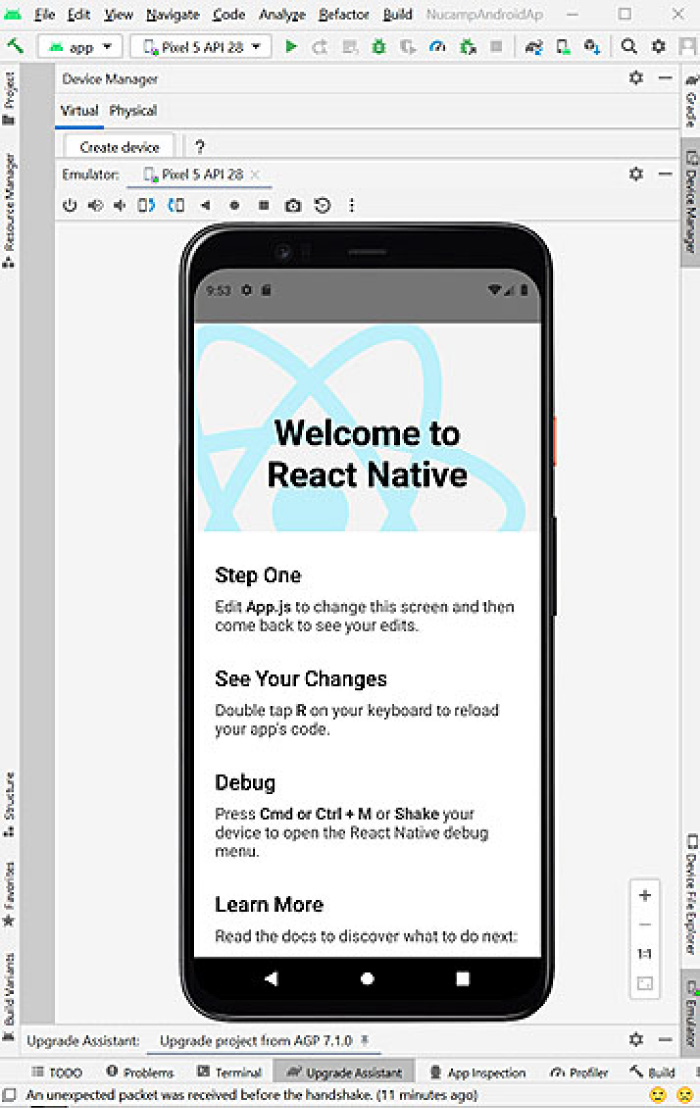
Figure 11.43 shows how the native application should appear in the emulator.
図11.43は、エミュレーター内でのネイティブアプリケーションの表示を示している。
Android Studio is a trademark of Google LLC. · 原著の利用条件・ソフトウェアの権利表示参照 · Source出典
Figure 11.43 Once the React Native application is successfully built, this is how the native application should appear in the emulator. (Android Studio is a trademark of Google LLC.)
図11.43 React Nativeアプリケーションのビルドが正常に完了すると、エミュレーター内のネイティブアプリケーションは、このように表示されるはずである。(Android StudioはGoogle LLCの商標。)