第11章Webアプリケーション開発
11.3 Sample Responsive WAD with Bootstrap/React and Node11.3 Bootstrap/ReactとNodeによるレスポンシブWebアプリケーション開発の例
Learning Objectives学習目標
By the end of this section, you will be able to:
この節を終えると、次のことができるようになる。
• Create a Todo web application with Bootstrap, React, and Node
• Bootstrap、React、NodeでTodoのWebアプリケーションを作成する。
• Create a Node back end
• Nodeのバックエンドを作成する。
• Build the controller
• Controllerを構築する。
• Set up the REST API
• REST APIを設定する。
• Create the React front end
• Reactのフロントエンドを作成する。
• Connect the React front end to the Node back end
• ReactのフロントエンドをNodeのバックエンドへ接続する。
In the previous section, you created a simple Todo application using Bootstrap and Django. In this section, you will continue to use Bootstrap to create another simple Todo application. But instead of working with Django, you will use React and Node. React, or React.js, is a JavaScript library popular to build user interfaces. Node, or Node.js, is a JavaScript runtime environment that provides users with the tools to develop web applications, as well as servers, scripts, and command-line tools.
英語のヒント
前の節では、BootstrapとDjangoを使って、単純なTodoアプリケーションを作成した。この節でもBootstrapを使い、もう1つの単純なTodoアプリケーションを作る。ただし、Djangoの代わりにReactとNodeを使う。React、またはReact.jsは、利用者インターフェースの構築によく使われるJavaScriptライブラリである。Node、またはNode.jsは、JavaScriptのランタイム環境であり、Webアプリケーション、サーバー、スクリプト、コマンドラインツールを開発するための道具を提供する。
Creating a Todo Web Application with Bootstrap and React and NodeBootstrap・React・NodeによるTodo Webアプリケーションの作成
When creating a Todo web application using React and Node, React serves as the front end, handling the user interface, as well as getting and setting data via HTTP requests using Axios. Node serves as the back end, using a REST API built with ExpressJS and the MongooseJS Object Data Modeling (ODM) to interact with a MongoDB database.
英語のヒント
ReactとNodeでTodoのWebアプリケーションを作る場合、Reactはフロントエンドとして、利用者インターフェースを扱い、Axiosを使ったHTTPリクエストによってデータを取得・設定する。Nodeはバックエンドとして、ExpressJSで作ったREST APIと、MongooseJSのオブジェクトデータモデリング(ODM)を使い、MongoDBデータベースとやり取りする。
Prerequisites前提条件
To build the Todo application using Bootstrap, React, and Node, you will need the following software components: React v17.0.2, Bootstrap v4.5.0, Node v14.17.5, ExpressJS v4.17.2, MongooseJS v6.1.9, and Axios v0.21.0. To begin, download and install Node.
Bootstrap、React、NodeでTodoアプリケーションを作るには、React v17.0.2、Bootstrap v4.5.0、Node v14.17.5、ExpressJS v4.17.2、MongooseJS v6.1.9、Axios v0.21.0が必要になる。まず、Nodeをダウンロードし、インストールする。
Creating the Node Back EndNodeのバックエンドの作成
Several steps are needed to build the Node application back end required for the Todo application. This section will explain each of these steps.
Todoアプリケーションに必要なNodeアプリケーションのバックエンドを構築するには、いくつかの手順がある。この項では、それぞれの手順を説明する。
LINK TO LEARNING学びを広げるリンク
Node (https://openstax.org/r/76NodeJS) is a JavaScript runtime environment that provides users with the tools to develop web applications, as well as servers, scripts, and command-line tools. Node, which is free, is open-source and cross-platform. It was designed to develop network applications that are scalable, managing many connections simultaneously. Unlike the typical inefficient concurrency model, with Node, a callback is fired with each connection, and Node sleeps unless work needs to be done.
英語のヒント
Node(https://openstax.org/r/76NodeJS)は、JavaScriptのランタイム環境であり、Webアプリケーション、サーバー、スクリプト、コマンドラインツールの開発に必要な道具を提供する。無料で、オープンソースであり、複数のプラットフォームに対応している。多数の接続を同時に管理し、規模を拡張できるネットワークアプリケーションを開発するために設計された。一般的な非効率な並行処理モデルとは異なり、Nodeでは接続のたびにコールバックが起動し、作業が必要なとき以外は休止する。
Creating the Node AppNodeアプリの作成
Before you can create the Todo application back end, you should create a Node app. To accomplish this, create the directory nodebackend/ and navigate into it. Next, run the following command to initialize the Node application:
英語のヒント
Todoアプリケーションのバックエンドを作る前に、Nodeアプリを作成する。そのために、nodebackend/ディレクトリを作り、その中へ移動する。次に、以下のコマンドを実行して、Nodeアプリケーションを初期化する。
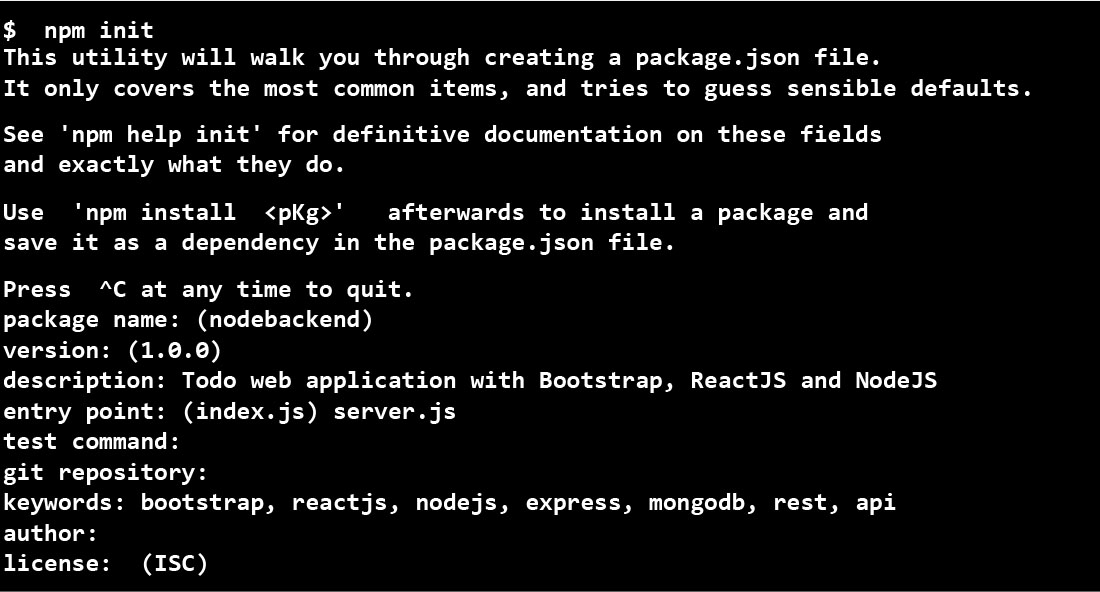
$ npm initAfter running this command, follow the prompt, which is highlighted in Figure 11.30.
このコマンドを実行したら、図11.30に示される入力案内に従う。
attribution: Copyright Rice University, OpenStax, under CC BY 4.0 license · CC BY 4.0 · Source出典
Figure 11.30 This prompt appears when the Node application is initialized. (attribution: Copyright Rice University, OpenStax, under CC BY 4.0 license)
図11.30 Nodeアプリケーションを初期化すると、この入力案内が表示される。(出典:Copyright Rice University, OpenStax、CC BY 4.0ライセンス)
After the Node application initialization is completed, a package.json file is generated, as shown in the following code.
Nodeアプリケーションの初期化が完了すると、次のコードのようなpackage.jsonファイルが生成される。
{
  "name": "nodebackend",
  "version": "1.0.0",
  "description": "Todo Web application with Bootstrap, ReactJS and NodeJS",
  "main": "server.js",
  "scripts": {
    "test": "echo \"Error: no test specified\" && exit 1"
  },
  "keywords": [
    "bootstrap",
    "reactjs",
    "nodejs",
    "express",
    "mongodb",
    "rest",
    "api"
  ],
  "author": "",
  "license": "ISC",
  "dependencies": {
    "body-parser": "^1.19.1",
    "cors": "^2.8.5",
    "express": "^4.17.2",
    "mongoose": "^6.1.9"
  }
}
Setting Up the Express Web ServerExpress Webサーバーの設定
Once the Node application is initialized, the next step is to set up the Express web server. To do this, use the following command to install Express, Mongoose (Mongoose is a library for MongoDB that is used to interact with MongoDB by facilitating the modeling of data as objects), and other dependent packages in the nodebackend/ directory:
英語のヒント
Nodeアプリケーションを初期化したら、次にExpress Webサーバーを設定する。そのために、次のコマンドを使い、nodebackend/ディレクトリにExpress、Mongoose、その他の依存パッケージをインストールする。Mongooseは、データをオブジェクトとしてモデル化しやすくし、MongoDBとのやり取りに使う、MongoDB用のライブラリである。
$ npm install express mongoose body-parser cors –saveNext, create the Express web server by going to the nodebackend/ directory, create the server.js file, and add the following code.
次に、nodebackend/ディレクトリへ移動し、server.jsファイルを作り、次のコードを追加して、Express Webサーバーを作成する。
const express = require("express");
const bodyParser = require("body-parser");
const cors = require("cors");

const app = express();

var corsOptions = {
  origin: "http://localhost:8081"
};
app.use(cors(corsOptions));

// parse requests of content-type - application/json
app.use(bodyParser.json());

// parse requests of content-type - application/x-www-form-urlencoded
app.use(bodyParser.urlencoded({ extended: true }));

// routes
app.get("/", (req, res) => {
  res.json({ message: "Welcome to the Todo Web App." });
});

require("./routes/todo.routes.js")(app);

// set port, listen for requests
const PORT = process.env.PORT || 8080;
app.listen(PORT, () => {
  console.log(`Server is running on port ${PORT}.`);
});
Once you use the code to import Express, you can build the REST APIs. The body-parser package is used to create and parse the request object. The cors package is used to serve as middleware for Express that enables CORS. The Express web server will run on port 8080 as the default port. Use the following command to start the server:
英語のヒント
コードでExpressをインポートすると、REST APIを構築できる。body-parserパッケージは、リクエストオブジェクトの作成と解析に使う。corsパッケージは、CORSを有効にするExpressのミドルウェアとして働く。Express Webサーバーは、既定のポート8080で動作する。次のコマンドでサーバーを起動する。
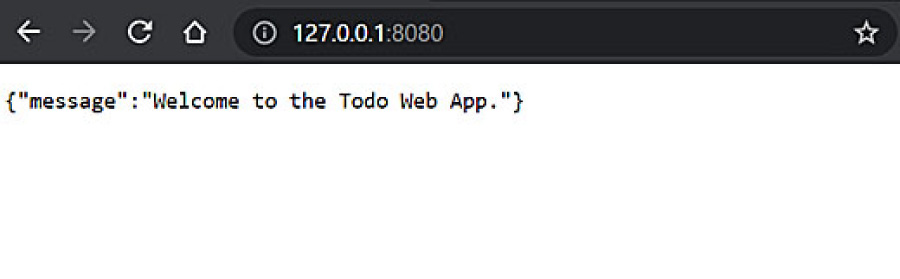
$ node server.jsIn a browser, navigate to http://localhost:8080/. The following page shown in Figure 11.31 renders.
ブラウザーでhttp://localhost:8080/へ移動する。図11.31のページが表示される。
rendered in Node; attribution: Copyright Rice University, OpenStax, under CC BY 4.0 license · CC BY 4.0 · Source出典
Figure 11.31 Once the Express web server is started, this page should appear at http://localhost:8080/. (rendered in Node; attribution: Copyright Rice University, OpenStax, under CC BY 4.0 license)
図11.31 Express Webサーバーを起動すると、http://localhost:8080/にこのページが表示されるはずである。(Nodeで表示。出典:Copyright Rice University, OpenStax、CC BY 4.0ライセンス)