Previously, you installed the Django REST Framework, which provides a toolkit to build APIs. In this section, you’ll create the serializers, View functions, and routers required for the API.
The next step is to implement two serializers, one for the Category model and one for the TodoList model. A serializer is a tool to control response outputs and convert complex data into content, such as JSON. In the todo/ directory, create the file, serializers.py, and add the code shown in the code snippet that follows. The serializer classes inherit from serializers.ModelSerializer because this class creates the serializer, with fields corresponding to the Model fields defined earlier. Each serializer specifies the Model to work with and the fields to be included in the JSON object, which are all fields.
# todo/serializers.py

from rest_framework import serializers
from .models import TodoList, Category

class CategorySerializer(serializers.ModelSerializer):
  class Meta:
    model = Category
    fields = "__all__"

class TodoSerializer(serializers.ModelSerializer):
  class Meta:
    model = TodoList
    fields = "__all__"
Creating the ViewViewの作成
After you create each serializer, the next step is to create a corresponding View function for both the Category serializer and the Todo serializer. To do this, open todo/views.py and add the code shown in the code snippet that follows. The viewsets class, which provides a default implementation of the CRUD operations, is imported from rest_framework. The CategoryView and TodoView classes provide a queryset of categories and todo items, respectively. They also specify the serializer_class defined in the previous section.
# -*- coding: utf-8 -*-
from __future__ import unicode_literals

from django.shortcuts import render,redirect
from rest_framework import viewsets
from .serializers import TodoSerializer, CategorySerializer
from .models import TodoList, Category
import datetime

# Create your views here.

class CategoryView(viewsets.ModelViewSet):
  queryset = Category.objects.all()
  serializer_class = CategorySerializer

class TodoView(viewsets.ModelViewSet):
  queryset = TodoList.objects.all()
  serializer_class = TodoSerializer
Creating the Routersルーターの作成
The next step is to create the routers that provide URL paths for the API. To do this, open the todo/urls.py file and add the code shown in the code snippet that follows:
from django.urls import path, include
#from todo import views as todo_views
from rest_framework import routers
from todo.views import *

router = routers.DefaultRouter()
router.register(r'categories', CategoryView, basename='Categories')
router.register(r'todos', TodoView, basename='Todos')

urlpatterns = [
  path('', index, name="TodoList"),
  path(r'api/', include(router.urls)),
]
Once you complete this step, launch the Django server using the following command:
この手順が完了したら、次のコマンドでDjangoサーバーを起動する。
$ python manage.py runserver
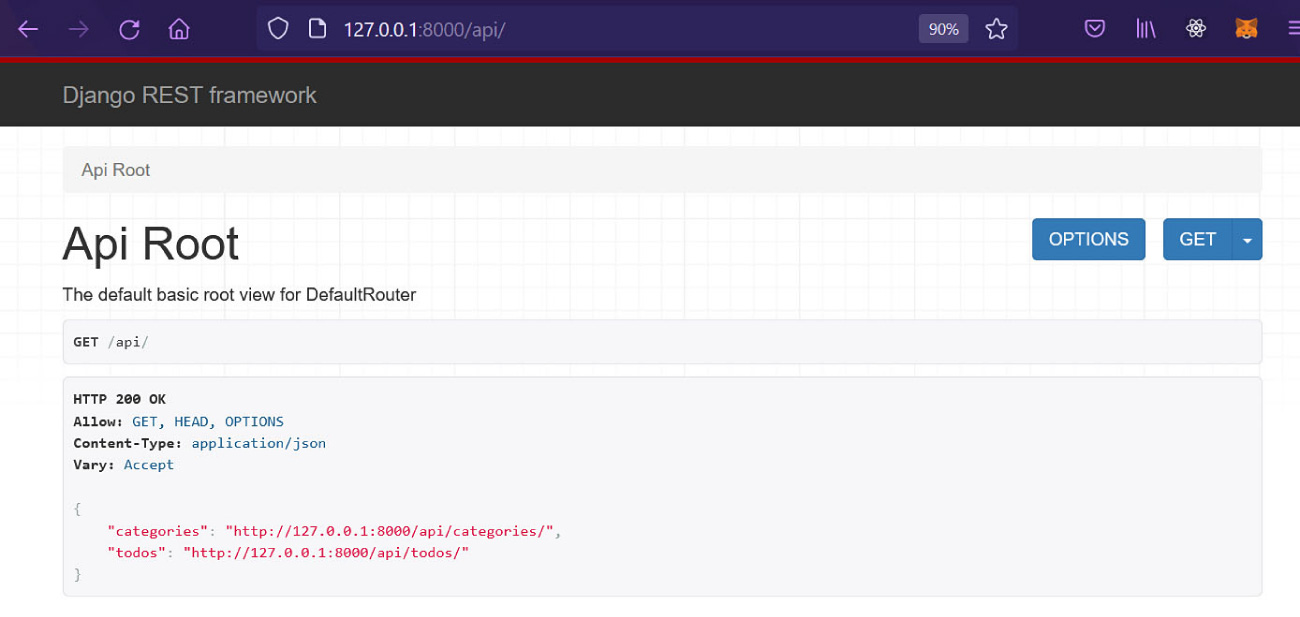
To access the API, launch a browser and navigate to http://127.0.0.1:8000/api/. As shown in Figure 11.21, you should see two API paths listed, one for categories and another for todo items.
rendered in Django, a registered trademark of the Django Software Foundation; attribution: Copyright Rice University, OpenStax, under CC BY 4.0 license · CC BY 4.0 · Source出典
Figure 11.21 Once the URL paths for the API are created, two API paths are listed—one path for categories and the other for todo. (rendered in Django, a registered trademark of the Django Software Foundation; attribution: Copyright Rice University, OpenStax, under CC BY 4.0 license)
図11.21 APIのURLパスを作成すると、カテゴリー用とtodo用の2つのAPIパスが表示される。(Djangoで表示。DjangoはDjango Software Foundationの登録商標。出典:Copyright Rice University, OpenStax、CC BY 4.0ライセンス)
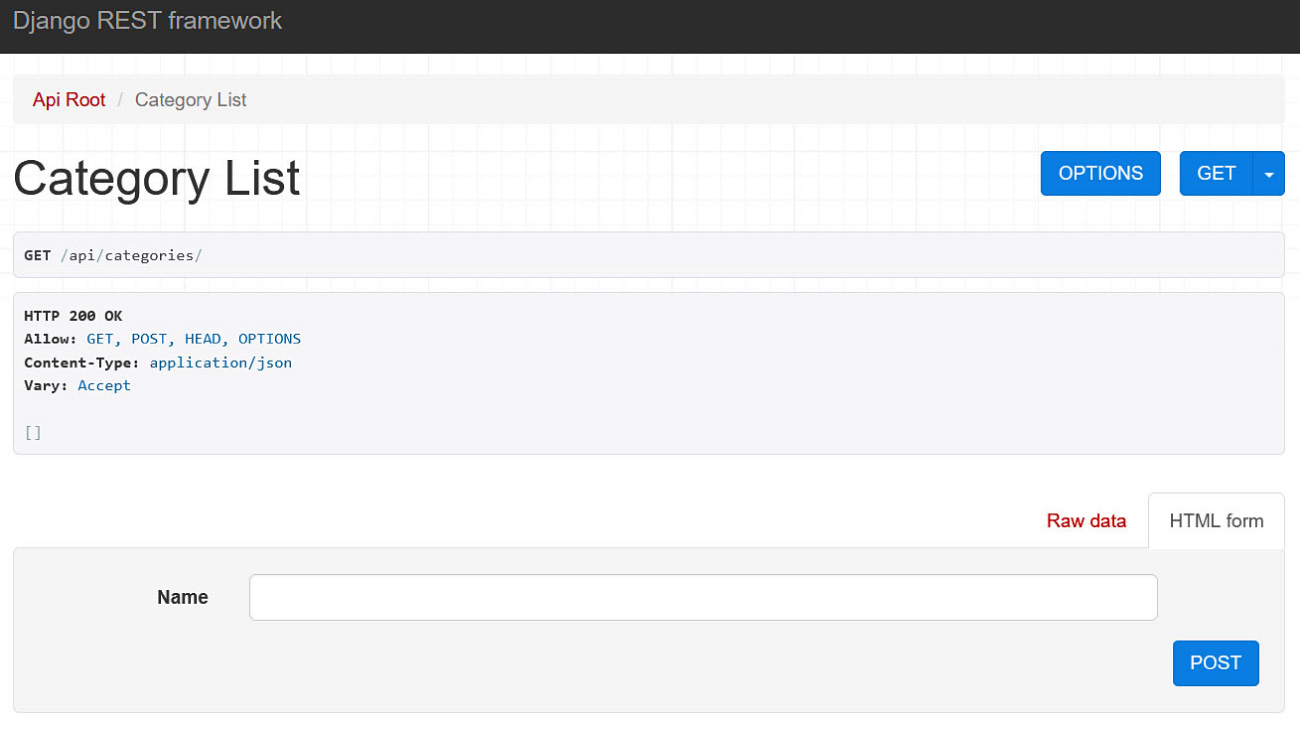
Todo items are dependent on categories. To perform CRUD operations on the Category table, click on the categories API path, as shown in Figure 11.22.
rendered in Django, a registered trademark of the Django Software Foundation; attribution: Copyright Rice University, OpenStax, under CC BY 4.0 license · CC BY 4.0 · Source出典
Figure 11.22 The API path can be used to perform CRUD operations on the Category table. (rendered in Django, a registered trademark of the Django Software Foundation; attribution: Copyright Rice University, OpenStax, under CC BY 4.0 license)
図11.22 このAPIパスを使って、Categoryテーブルに対するCRUD操作を行える。(Djangoで表示。DjangoはDjango Software Foundationの登録商標。出典:Copyright Rice University, OpenStax、CC BY 4.0ライセンス)
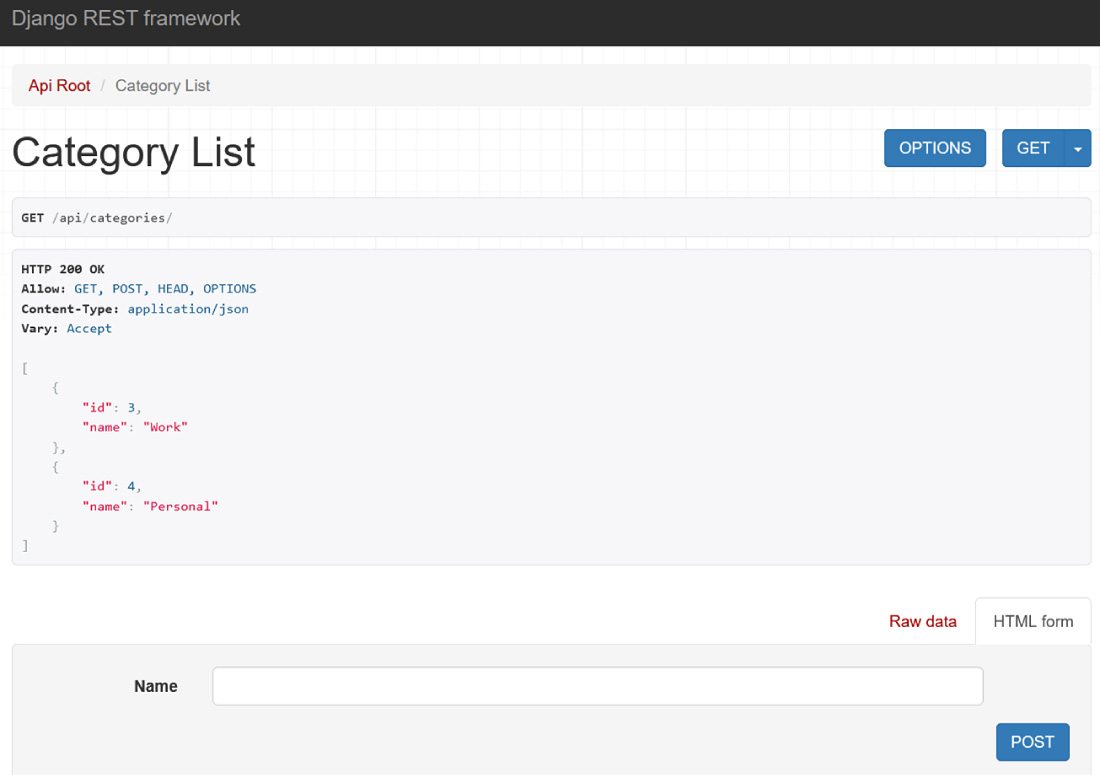
Once you access the Category List page, enter a category name in the field near the bottom of the page and click the Post button to save it. You can add additional category names. Once you save each name using the Post button, the categories will appear in JSON format, as illustrated in Figure 11.23.
rendered in Django, a registered trademark of the Django Software Foundation; attribution: Copyright Rice University, OpenStax, under CC BY 4.0 license · CC BY 4.0 · Source出典
Figure 11.23 The Category List is created in JSON format after saving category names. (rendered in Django, a registered trademark of the Django Software Foundation; attribution: Copyright Rice University, OpenStax, under CC BY 4.0 license)
図11.23 カテゴリー名を保存すると、Category ListがJSON形式で作られる。(Djangoで表示。DjangoはDjango Software Foundationの登録商標。出典:Copyright Rice University, OpenStax、CC BY 4.0ライセンス)
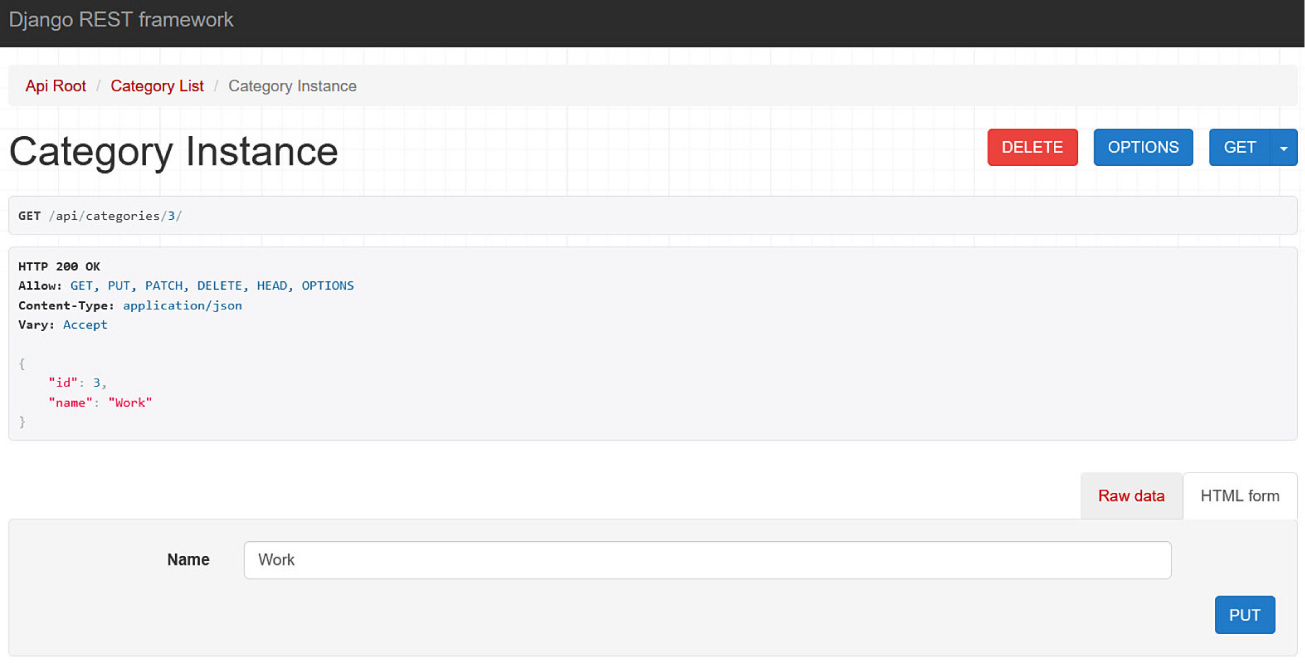
To ensure that categories can be updated or deleted as needed, the primary key, which is “id”, must be included in the API path (e.g., /api/categories/{id}/). For example, to update or delete the category with id=3, the API path is /api/categories/3/. As shown in Figure 11.24, once this category is pulled up on the Category Instance page, the DELETE button is visible at the top to delete the category. If the category needs to be updated, the PUT button visible near the bottom can be used for updates.
rendered in Django, a registered trademark of the Django Software Foundation; attribution: Copyright Rice University, OpenStax, under CC BY 4.0 license · CC BY 4.0 · Source出典
Figure 11.24 The Category Instance page provides DELETE and PUT buttons, which, respectively, can be used to delete or update a category. (rendered in Django, a registered trademark of the Django Software Foundation; attribution: Copyright Rice University, OpenStax, under CC BY 4.0 license)
図11.24 Category Instanceページには、カテゴリーの削除と更新にそれぞれ使える、DELETEボタンとPUTボタンがある。(Djangoで表示。DjangoはDjango Software Foundationの登録商標。出典:Copyright Rice University, OpenStax、CC BY 4.0ライセンス)
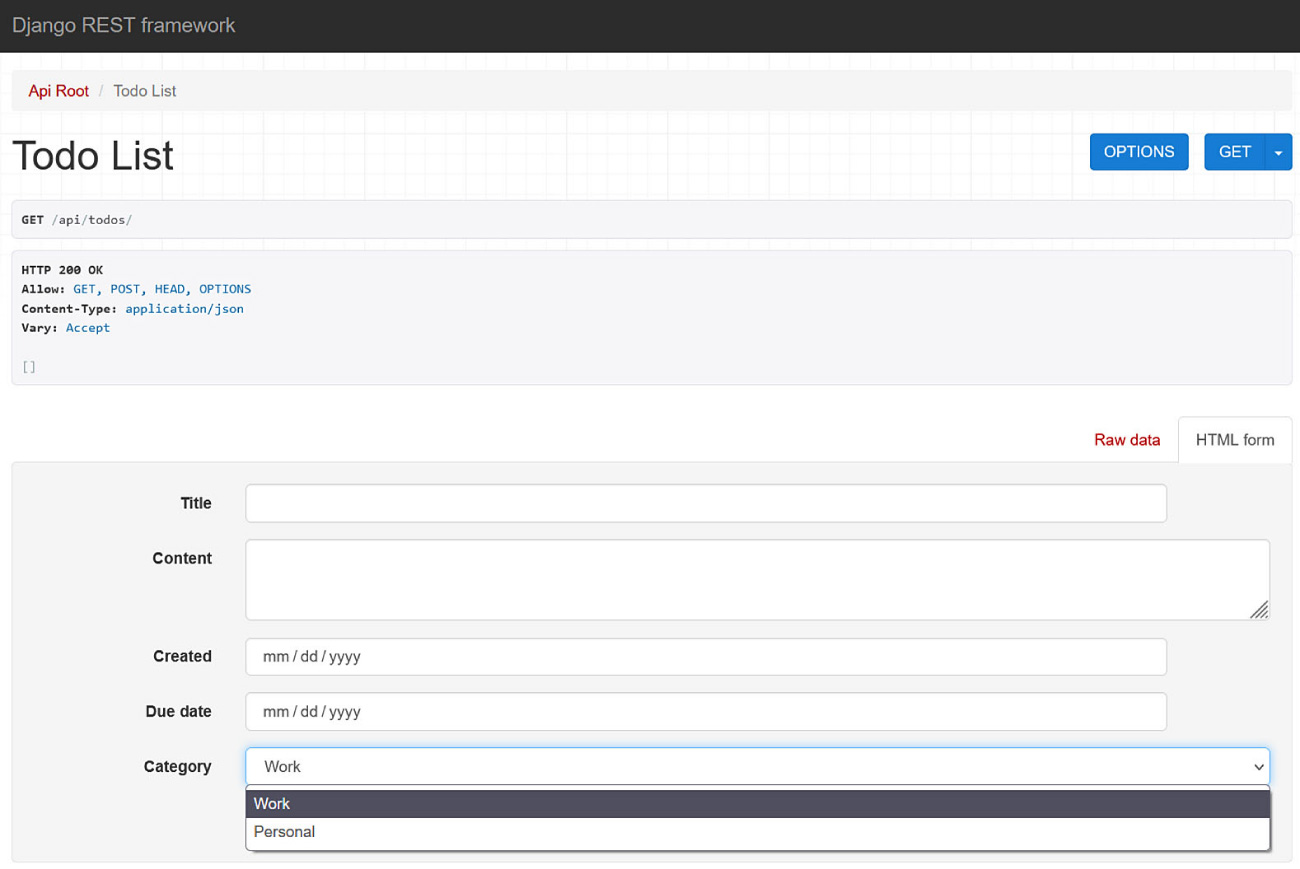
Next, navigate back to the API root. Click on the todos API path to see, as outlined in Figure 11.25, that a Todo item has a Category field that appears as a drop-down list of categories. The CRUD operations also can be performed on the TodoList table. This will be done next through the user interface via templates.
rendered in Django, a registered trademark of the Django Software Foundation; attribution: Copyright Rice University, OpenStax, under CC BY 4.0 license · CC BY 4.0 · Source出典
Figure 11.25 After the routers are created, a Todo item has a Category field that appears as a drop-down list of categories, such as “Work” and “Personal.” (rendered in Django, a registered trademark of the Django Software Foundation; attribution: Copyright Rice University, OpenStax, under CC BY 4.0 license)
図11.25 ルーターを作成すると、Todo項目には、“Work”や“Personal”などのカテゴリーをドロップダウンリストで表示する、Categoryフィールドができる。(Djangoで表示。DjangoはDjango Software Foundationの登録商標。出典:Copyright Rice University, OpenStax、CC BY 4.0ライセンス)