第11章Webアプリケーション開発
Set Up the REST APIREST APIの設定
Once the controller is built, the next step is to set up the REST API. A client will send HTTP requests (e.g., GET, POST, PUT, and DELETE) to the REST API endpoints that determine how the server will manage these requests and provide a response. To do this, routes for the REST API are first defined. In the nodebackend/ directory, create the routes/ directory. In the routes/ directory, create the file todo.routes.js and add the following code. In this code, the routes require access to the CRUD functions declared in the controller.
英語のヒント
Controllerを構築したら、次にREST APIを設定する。クライアントは、GET、POST、PUT、DELETEなどのHTTPリクエストを、REST APIのエンドポイントへ送る。エンドポイントは、サーバーがこれらの要求をどのように処理し、応答するかを決める。そのため、まずREST APIのルートを定義する。nodebackend/ディレクトリにroutes/ディレクトリを作り、その中にtodo.routes.jsファイルを作成して、次のコードを追加する。このコードでは、ルートがController内で宣言されたCRUD関数にアクセスする必要がある。
module .exports = app => {
  const todos = require("../controllers/todo.controller.js");
  var router = require("express").Router();

  // Create a new todo item
  router.post("/", todos.create);

  // Retrieve all todo items
  router.get("/", todos.findAll);

  // Retrieve a todo item by id
  router.get("/:id", todos.findOne);

  // Update a todo item by id
  router.put("/:id", todos.update);

  // Delete a todo item by id
  router.delete("/:id", todos.delete);

  // Delete all todo items
  router.delete("/", todos.deleteAll);

  app.use("/api/todos", router);

};
The next step is to update nodebackend/server.js to import the routes shown in the following code.
次に、nodebackend/server.jsを更新し、次のコードのルートをインポートする。
// routes
app.get("/", (req, res) => {
  res.json({ message: "Welcome to the Todo Web App." });
});

require("./routes/todo.routes.js")(app);

// set port, listen for requests
const PORT = process.env.PORT || 8080;
app.listen(PORT, () => {
  console.log(`Server is running on port ${PORT}.`);
});
The next step is to run the Express web server to test the CRUD functions and interact with the MongoDB database. To do this, run the following command:
次に、Express Webサーバーを動かし、CRUD関数をテストして、MongoDBデータベースとやり取りする。そのために、次のコマンドを実行する。
$ node server.jsLINK TO LEARNING学びを広げるリンク
As an API platform Postman (https://openstax.org/r/76Postman) can be a useful programming interface to build and use APIs. Postman is simplified, making it easier to build APIs quickly. With Postman, developers can also test and modify APIs to ensure they meet specifications.
英語のヒント
APIプラットフォームであるPostman(https://openstax.org/r/76Postman)は、APIを構築し利用するための便利なプログラミングインターフェースとなる。単純化されており、APIを素早く作りやすくする。また、開発者はPostmanでAPIをテストし、変更して、仕様を満たしていることを確認できる。
To test the REST API, use Postman, which is an API platform testing tool that can be used as a client. To accomplish this, follow these steps:
REST APIをテストするには、クライアントとして使えるAPIプラットフォームのテストツール、Postmanを利用する。次の手順で進める。
• Install and launch Postman.
• Postmanをインストールし、起動する。
• Select POST as the request method.
• リクエストのメソッドとしてPOSTを選ぶ。
• Enter the URL http://localhost:8080/api/todos to test creating a todo item.
• todo項目の作成をテストするため、URLとしてhttp://localhost:8080/api/todosを入力する。
• In the data input frame, select “Body.”
• データ入力の枠で“Body”を選ぶ。
• Select “raw” and “JSON” for the data format.
• データ形式として“raw”と“JSON”を選ぶ。
• Enter a JSON object representing a todo item to be created as shown.
• 作成するtodo項目を表すJSONオブジェクトを、示されたとおりに入力する。
• Click Send.
• Sendをクリックする。
After you follow these steps, the bottom frame should receive a response with status “200 OK” indicating the request was handled successfully. The body of the created todo item will also display along with a generated id field. You can use this method to test all the CRUD functions.
英語のヒント
これらの手順を実行すると、下部の枠に、要求が正常に処理されたことを示すステータス“200 OK”の応答が届くはずである。作成したtodo項目の本体も、生成されたidフィールドとともに表示される。この方法を使って、すべてのCRUD関数をテストできる。
Creating the React Front EndReactのフロントエンドの作成
Once you complete these steps and have the back end of the Todo web application up and running, the next step is to implement the front end using React. This section will outline the steps to accomplish this.
英語のヒント
これらの手順を完了し、Todo Webアプリケーションのバックエンドが動作するようになったら、次にReactでフロントエンドを実装する。この項では、その手順の概要を説明する。
LINK TO LEARNING学びを広げるリンク
React (https://openstax.org/r/76ReactJS) is a JavaScript library popular to build user interfaces. It relies on individual pieces known as components, which are JavaScript functions. React components are created using code and markup, and once created, React components can be combined to develop applications, screens, and web pages. React also has the capability to be added to HTML pages, rather than building an entire page using React.
英語のヒント
React(https://openstax.org/r/76ReactJS)は、利用者インターフェースの構築によく使われるJavaScriptライブラリである。コンポーネントと呼ばれる個々の部品を基にしており、それらはJavaScriptの関数である。Reactのコンポーネントは、コードとマークアップを使って作成する。作成後には、それらを組み合わせてアプリケーション、画面、Webページを開発できる。また、ページ全体をReactで作るだけでなく、既存のHTMLページへReactを追加することもできる。
Creating the React AppReactアプリの作成
To create the React app, the first step is to run the following command. This should be done in a directory that is outside and separate from the nodebackend/ directory.
Reactアプリを作る最初の手順は、次のコマンドの実行である。これは、nodebackend/ディレクトリの外にある、別のディレクトリで行う。
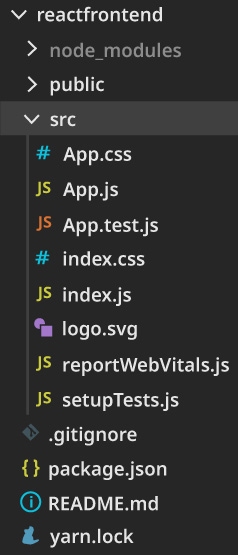
$ npx create-react-app reactfrontendOnce you run the command, it will generate the React application files in the reactfrontend/ directory, which is shown in Figure 11.32.
コマンドを実行すると、図11.32のように、reactfrontend/ディレクトリ内にReactアプリケーションのファイルが生成される。
rendered in React by Meta Open Source; attribution: Copyright Rice University, OpenStax, under CC BY 4.0 license · CC BY 4.0 · Source出典
Figure 11.32 This shows the React application files in the reactfrontend/ directory. (rendered in React by Meta Open Source; attribution: Copyright Rice University, OpenStax, under CC BY 4.0 license)
図11.32 reactfrontend/ディレクトリ内のReactアプリケーションのファイル。(Meta Open SourceのReactで表示。出典:Copyright Rice University, OpenStax、CC BY 4.0ライセンス)
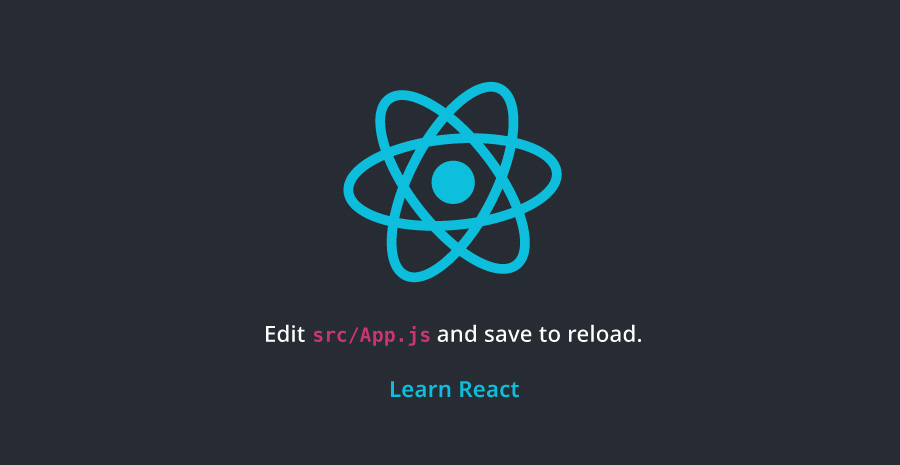
The next step is to navigate into the reactfrontend/ directory and launch the React application to confirm the React front-end application was created successfully. At this point, this application is not connecting to the Node back end, so it launches a default React page. Run the command, which will automatically launch a browser page to http://localhost:3000.
次に、reactfrontend/ディレクトリへ移動してReactアプリケーションを起動し、Reactのフロントエンドが正常に作成されたことを確認する。この時点では、まだNodeのバックエンドに接続していないため、標準のReactページが表示される。コマンドを実行すると、ブラウザーが自動的に起動し、http://localhost:3000を開く。
$ npm startYou will see the following, as illustrated in Figure 11.33.
図11.33のように表示される。
credit: React by Meta Open Source · 原著の利用条件・ソフトウェアの権利表示参照 · Source出典
Figure 11.33 When the React front-end application is created successfully, this page launches at http://localhost:3000. (credit: React by Meta Open Source)
図11.33 Reactのフロントエンドアプリケーションが正常に作成されると、http://localhost:3000にこのページが開く。(クレジット:React by Meta Open Source)