第11章Webアプリケーション開発
11.2 Sample Responsive WAD with Bootstrap and Django11.2 BootstrapとDjangoによるレスポンシブWebアプリケーション開発の例
Learning Objectives学習目標
By the end of this section, you will be able to:
この節を終えると、次のことができるようになる。
• Create a Todo web application with Bootstrap and Django
• BootstrapとDjangoでTodoのWebアプリケーションを作成する。
• Create a Django project
• Djangoプロジェクトを作成する。
• Create and register a Todo app
• Todoアプリを作成して登録する。
• Define the Todo model
• Todoモデルを定義する。
• Set up the Django REST APIs
• DjangoのREST APIを設定する。
• Create the user interface
• 利用者インターフェースを作成する。
In this module, you will create a simple, responsive Todo application. To accomplish this, you will use Bootstrap and Django. Bootstrap is an open-source, responsive web application framework, and Django is a Python-based web application development framework. Both frameworks are highly popular due to their ease of use.
英語のヒント
この節では、単純でレスポンシブなTodoアプリケーションを作成する。そのために、BootstrapとDjangoを使う。Bootstrapは、オープンソースのレスポンシブWebアプリケーションフレームワークであり、Djangoは、Pythonを基盤とするWebアプリケーション開発フレームワークである。どちらも使いやすいため、広く利用されている。
Creating a Todo Web Application with Bootstrap and DjangoBootstrapとDjangoによるTodoのWebアプリケーションの作成
The Todo web application in this subsection uses Bootstrap and Django. Bootstrap’s CSS templates are used for the UI features. Django serves as both the front end and back end. Django templates are part of the user interface to get and set data via HTTP requests. Incoming requests are then handled by an API built using the Django REST Framework.
英語のヒント
この項のTodo Webアプリケーションには、BootstrapとDjangoを使う。UIの機能には、BootstrapのCSSテンプレートを使う。Djangoは、フロントエンドとバックエンドの両方を担う。Djangoのテンプレートは、HTTPリクエストを通じてデータを取得・設定する、利用者インターフェースの一部である。受信した要求は、Django REST Frameworkで構築したAPIが処理する。
Prerequisites前提条件
To build the Todo application, you must install Python, PIP, Django, Django REST Framework, Bootstrap, and jQuery. The Todo application on the following pages was developed and tested with specific software versions. To avoid errors, please ensure you install the same versions: Python v3.9.4, PIP v21.3.1, Django v4.0.1, Django REST Framework v3.13.1, Bootstrap v4.5.0, and jQuery v3.5.1.
英語のヒント
Todoアプリケーションを作るには、Python、PIP、Django、Django REST Framework、Bootstrap、jQueryをインストールする必要がある。これ以降に示すTodoアプリケーションは、特定のバージョンのソフトウェアで開発・テストされている。エラーを避けるため、同じバージョンをインストールすること。Python v3.9.4、PIP v21.3.1、Django v4.0.1、Django REST Framework v3.13.1、Bootstrap v4.5.0、jQuery v3.5.1である。
The steps to build the Todo application are as follows:
Todoアプリケーションを作る手順は、次のとおりである。
• Install and set up a local programming environment for Python 3.
• Python 3のローカルなプログラミング環境をインストールし、設定する。
• Download and install Python 3.9.4.
• Python 3.9.4をダウンロードし、インストールする。
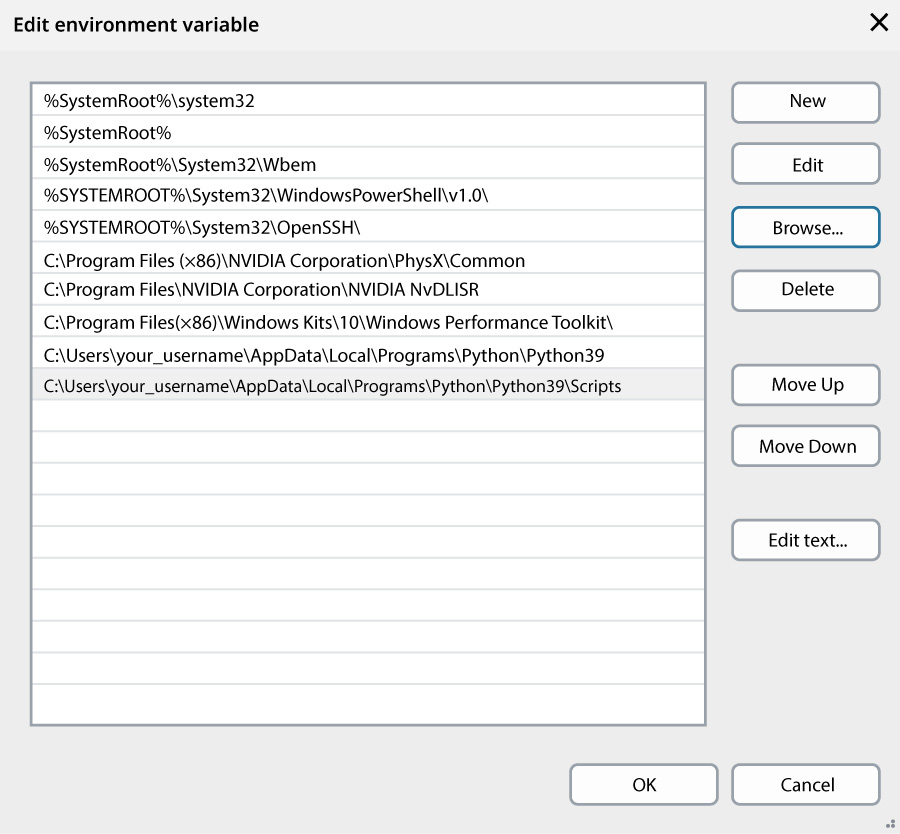
• Figure 11.14 shows adding Python and its Scripts subfolder to your path environment data (on Windows, the path updates might be: C:\Users\your_username\AppData\Local\Programs\Python\Python39 and C:\Users\your_username\AppData\Local\Programs\Python\Python39\Scripts).
• 図11.14は、PythonとそのScriptsサブフォルダーを、環境変数pathに追加する様子を示している。Windowsでは、追加するパスはC:\Users\your_username\AppData\Local\Programs\Python\Python39とC:\Users\your_username\AppData\Local\Programs\Python\Python39\Scriptsなどになる。
Microsoft Windows. Used with permission from Microsoft. · Microsoft screenshot permission · Source出典
Figure 11.14 This is what appears when adding Python and its Scripts folders to the environment variables path on Windows. (Used with permission from Microsoft.)
図11.14 Windowsで、PythonとそのScriptsフォルダーを環境変数pathへ追加する際の表示。(Microsoftの許可を得て使用。)
• Create a Python venv:
• Pythonのvenvを作成する。
$ python -m venv py394venv• Activate the venv:
• venvを有効にする。
$ cd py394venvWindows:
$ .\Scripts\activate.bat macOS: $ source ./bin/activateWindows:$ .\Scripts\activate.batmacOS:$ source ./bin/activate
• Install in the local programming environment Django:
• ローカルのプログラミング環境にDjangoをインストールする。
$ pip install Django==4.0.1• Install in the local programming environment Django REST Framework:
• ローカルのプログラミング環境にDjango REST Frameworkをインストールする。
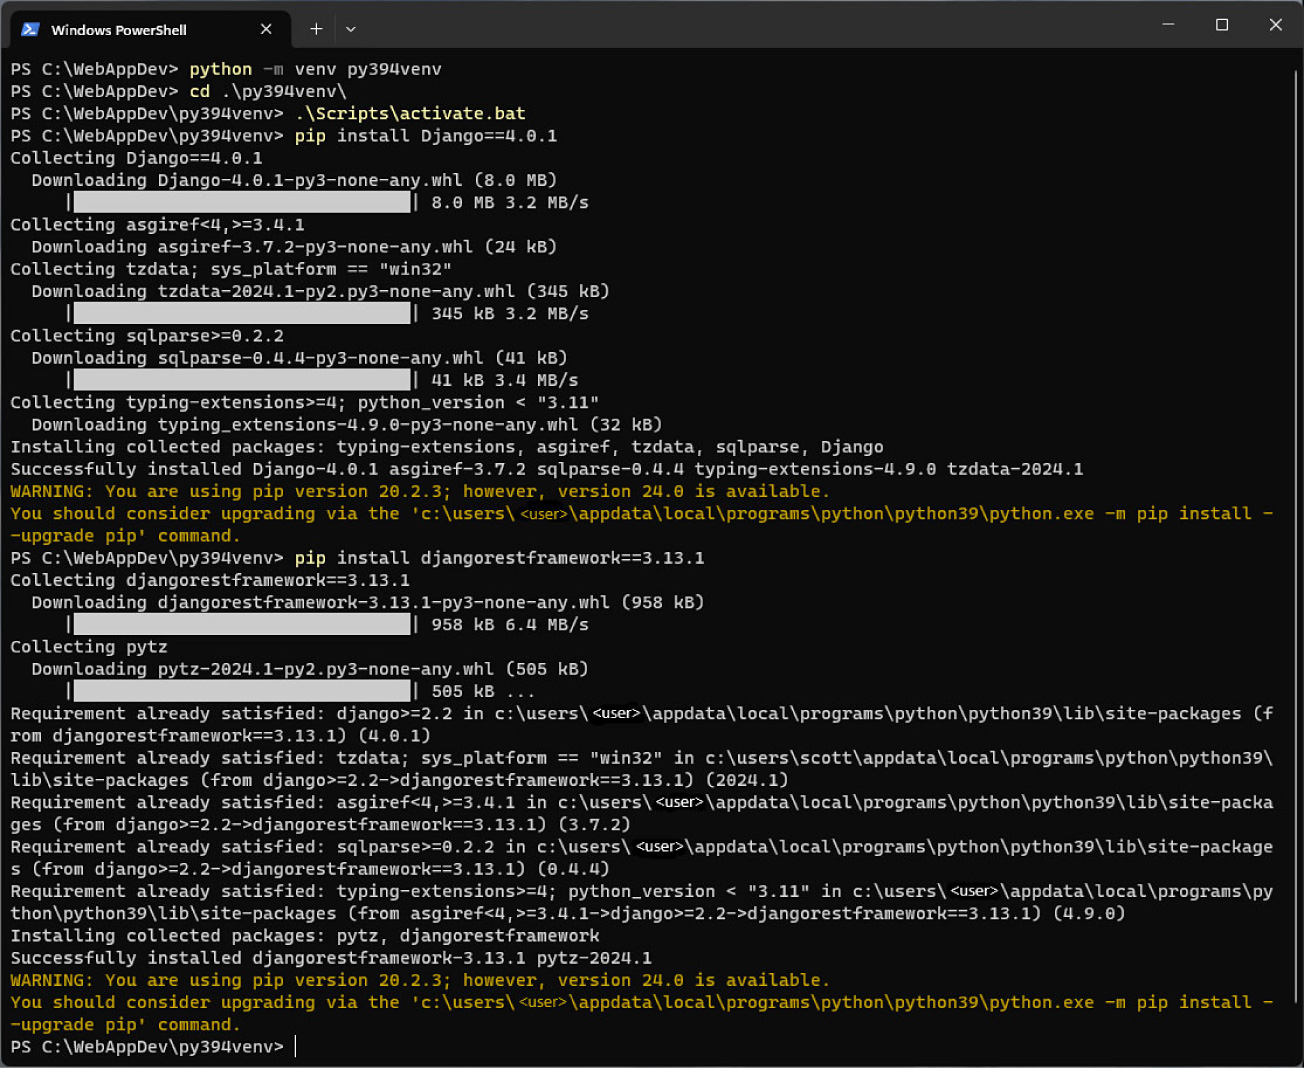
$ pip install djangorestframework==3.13.1]Figure 11.15 shows the sequence of steps needed to install the Python environment for working with Django and the Django REST Framework.
図11.15は、DjangoとDjango REST Frameworkを使うためのPython環境をインストールする、一連の手順を示している。
Microsoft Windows PowerShell. Used with permission from Microsoft. · Microsoft screenshot permission · Source出典
Figure 11.15 This screenshot displays the sequence of steps needed to install the Python environment. (Used with permission from Microsoft)
図11.15 Python環境のインストールに必要な、一連の手順のスクリーンショット。(Microsoftの許可を得て使用。)
Creating the Django ProjectDjangoプロジェクトの作成
The first step to building a Django web application is to create a Django project, which is a high-level directory used to contain the directories and files necessary to run a Django web application. To create a Django project, run the following commands:
英語のヒント
DjangoのWebアプリケーションを作る最初の手順は、Djangoプロジェクトの作成である。Djangoプロジェクトは、アプリケーションの実行に必要なディレクトリやファイルを収める、上位のディレクトリである。Djangoプロジェクトを作るには、次のコマンドを実行する。
$ mkdir BootstrapDjangoToDoApp
$ cd BootstrapDjangoToDoApp
$ django-admin startproject ToDoApp.
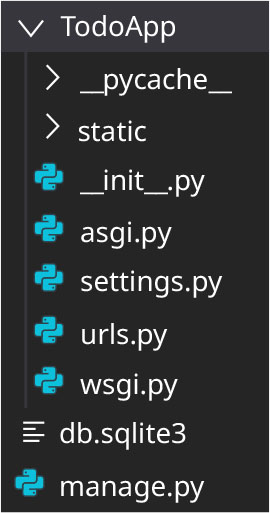
The period at the end of the last command is very important to ensure that Django-dependent files are generated in the current directory. By following these commands, the directory, BootstrapDjangoToDoApp/, will be created and Django-dependent files will be generated as shown in Figure 11.16.
最後のコマンドの末尾にあるピリオドは、Djangoに必要なファイルを現在のディレクトリに生成させるために、非常に重要である。これらのコマンドを実行すると、BootstrapDjangoToDoApp/ディレクトリが作られ、図11.16のように、Djangoに必要なファイルが生成される。
rendered in Django, a registered trademark of the Django Software Foundation; attribution: Copyright Rice University, OpenStax, under CC BY 4.0 license · CC BY 4.0 · Source出典
Figure 11.16 The directory BootstrapDjangoToDoApp/ includes these Django-dependent files. (rendered in Django, a registered trademark of the Django Software Foundation; attribution: Copyright Rice University, OpenStax, under CC BY 4.0 license)
図11.16 BootstrapDjangoToDoApp/ディレクトリには、これらのDjango関連ファイルが含まれる。(Djangoで表示。DjangoはDjango Software Foundationの登録商標。出典:Copyright Rice University, OpenStax、CC BY 4.0ライセンス)
Django built-in database tables are used to manage users, groups, migrations, and so forth in a web application. To generate these tables, run the migrate command:
英語のヒント
Djangoに組み込まれたデータベースのテーブルは、Webアプリケーションの利用者、グループ、マイグレーションなどを管理するために使われる。これらのテーブルを生成するには、migrateコマンドを実行する。
$ python manage.py migrateThe final step to creating a Django project is to confirm that the setup was completed. To do this, run the runserver command shown here:
Djangoプロジェクト作成の最後の手順は、設定が完了したことを確認することである。そのために、次のrunserverコマンドを実行する。
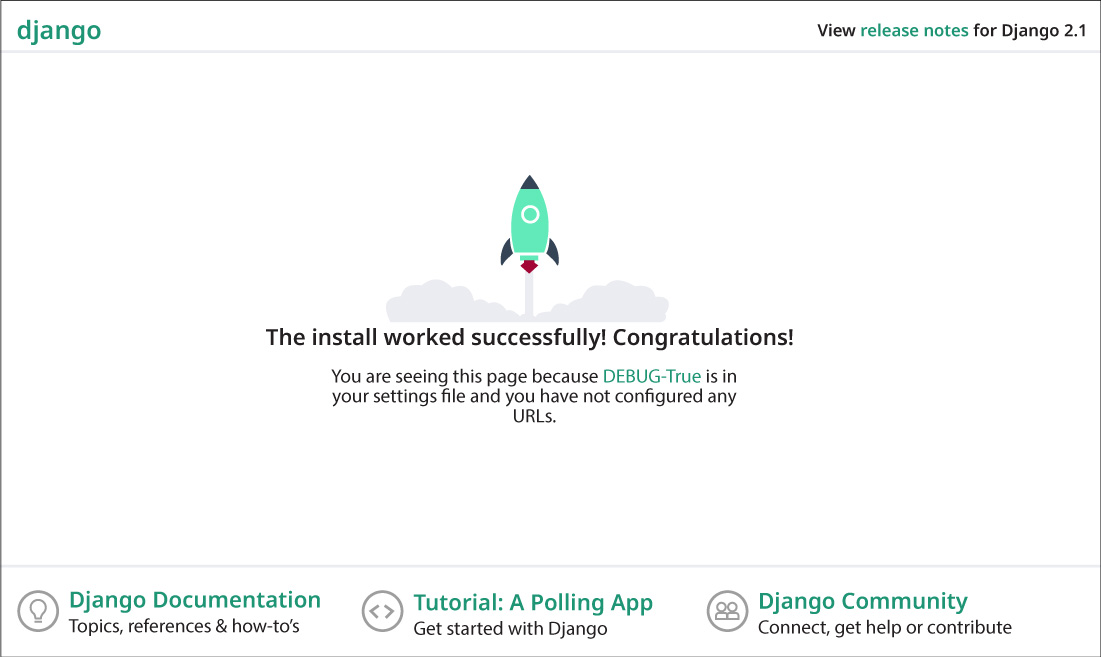
$ python manage.py runserverTo further confirm that the Django project setup was completed, launch a browser and navigate to http://localhost:8000. Figure 11.17 shows the Django page.
Djangoプロジェクトの設定が完了したことをさらに確認するには、ブラウザーを起動し、http://localhost:8000へ移動する。図11.17は、Djangoのページを示している。
credit: Django is a registered trademark of the Django Software Foundation. · 原著の利用条件・ソフトウェアの権利表示参照 · Source出典
Figure 11.17 Once the Django project setup is successfully completed, this page should appear at http://localhost:8000. (credit: Django is a registered trademark of the Django Software Foundation.)
図11.17 Djangoプロジェクトの設定が正常に完了すると、http://localhost:8000にこのページが表示されるはずである。(クレジット:DjangoはDjango Software Foundationの登録商標。)
LINK TO LEARNING学びを広げるリンク
Django (https://openstax.org/r/76Django) is a free and open-source Python web framework that can make web development more efficient and less time-consuming. With an emphasis on streamlining web development and making it easier for web developers to meet deadlines, Django also requires less code.
英語のヒント
Django(https://openstax.org/r/76Django)は、無料でオープンソースのPython用Webフレームワークであり、Web開発を効率化して、必要な時間を減らすことができる。Web開発を円滑にし、開発者が期限を守りやすくすることに重点を置いており、必要なコードも少なくて済む。